
Friday, October 19, 2012
Give Thanks
Saturday, August 4, 2012
Patriotic Banner


Supplies: Fabric, you can get about 16 (front and back) flags out of 1 yard of fabric.
Bias Tape
Thread
Scissors
Rotary Cutter and Mat
Ruler
Instructions: These are general instructions.
1. We cut out triangles that were 8 inches across and 10 inches in length. We used a rotary mat and cutter to make this process quick and easy. You can also make a paper template to help with this as well. Cut out as many as you would like. Odd numbers look best to the eye.
2. Sew the triangles in a "V" shape by leaving the top open and sewing the long sides of the triangles. Sew about a 1/4". Wrong sides should be together.
3. Place the non-sewn edge of the triangles in the bias tape and evenly spaced and pin. Decide how closely together you would like your triangles. Sew along the edge of the bias tape catching both sides of the bias tape and the triangle.
Enjoy!
Thursday, August 2, 2012
Sock Monkeys


A few suggestions that I would make are:
1. Use a stretch stitch when using your sewing machine. You will have a lot less chance of a young child breaking the stitch if it is a stretch stitch.
2. Use an upholstery (curved) needle when sewing on the mouth. I believe it will be easier. I am going to try it out next week and see.
3. It takes about 4 oz of fiberfill for one adult monkey.
4. I used adult knee length socks and I thought they turned out way cute.
5. Read the instructions. I started without reading thoroughly and it cost me some time.
I hope you enjoy these as much as I did.
Saturday, June 2, 2012
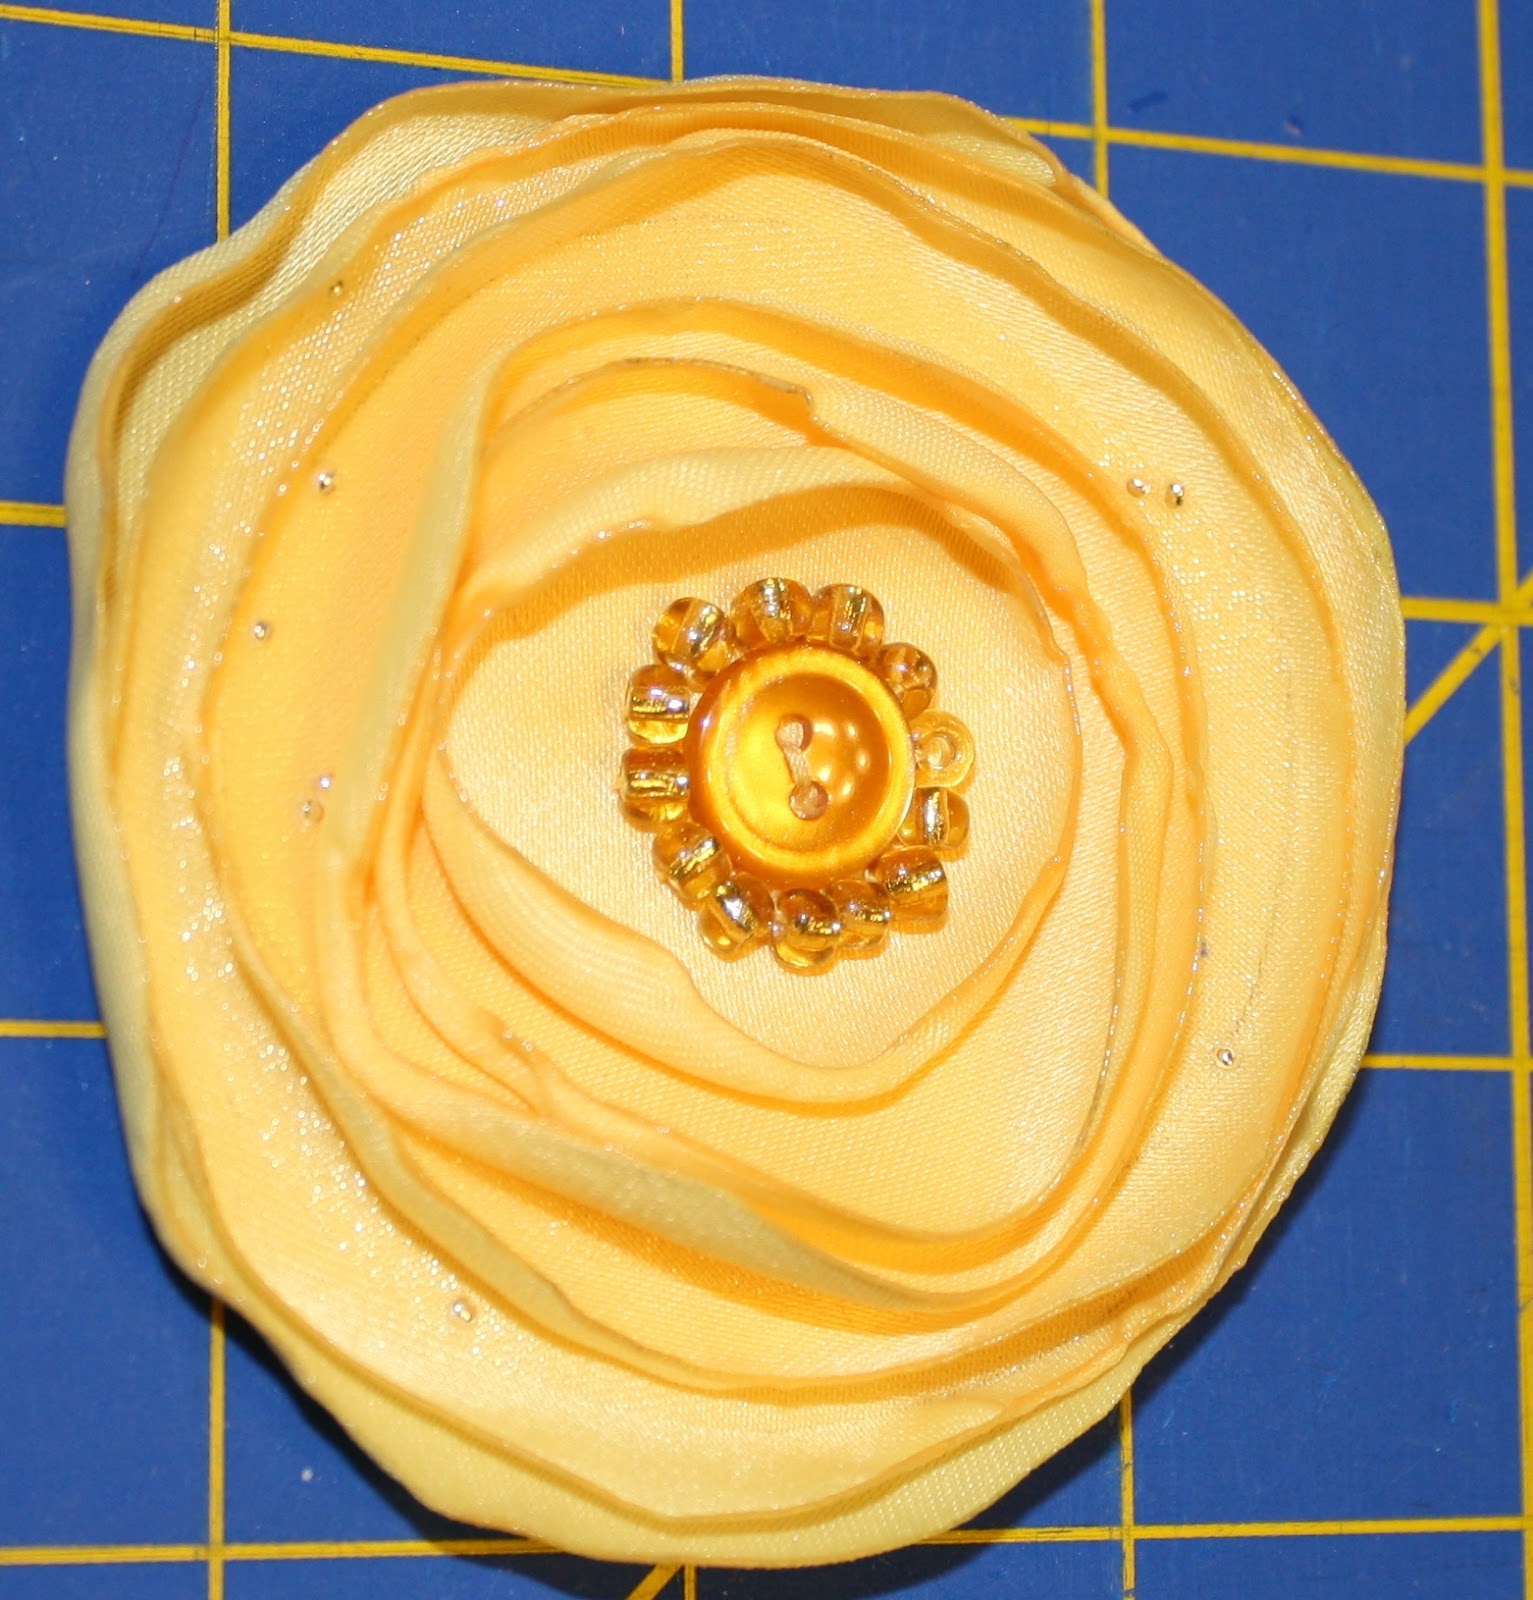
Petal Flowers
 Supplies:
Fabric: Satin, Tulle, etc.
Embellishments for center
Felt
Headband or Clips
Circle Template or Rotary Circle Cutter
Scissors
Needle
Thread
Pencil
Glue Gun
Step 1: Cut circles out in
varying sizes. The more layers you have
the puffier your flower will look. Have
a minimum of 8 layers. Here is a circle template.

Step 2: Cut 5 slits evenly
around circle cutting about 1/3 of the way in.
This will form the petals. You
can do more or less if you prefer.

Step 3: Begin cutting the corners of the slits to
give the petals a rounded edge. Do all
the corners.

Step 4: Using a heat source,
such as a tealight or gas range, begin melting the edges. I prefer to turn in the other petals to help
keep them out of the way and it also helps create a roundness to the
petal. Do not put the petal too close to
the fire or it will burn (blacken) and melt too much. Always use safety measures when working with
fire. Keep a cup of cold water nearby.

Step 5: It should look something like this after
burning one petal.

Step 6: Continue to melt the rest of the petals one
at a time. Be sure to melt all raw
edges.

Step 7: This is what it should look like when
done. Notice the blackened edge. That is from getting it too close to the
fire. Finish all flowers EXCEPT the
tulle ones as they will melt entirely.

Step 8: Begin layering the petals in order by
size. Place the tulle in as well.

Step 9: Using a needle and thread. Tack the center of the flower by making an
“X” stitch. This stitch will hold the
flower together. It will also be hidden
and not seen when embellishment is placed on to the flower.

Step 10: Put a dab of glue on the embellishment.


Circle Flowers for Headband/Clips

Supplies:
*Fabric: Satin, Tulle, etc.
*Embellishments for center
*Felt
*Headband or Clips
*Circle Template or Rotary Circle Cutter
*Scissors
*Needle
*Thread
*Pencil
*Glue Gun
Step 1: Cut circles out in
varying sizes. The more layers you have
the puffier your flower will look. Have
a minimum of 8 layers. Here is a circle template.

Step 2: Using a heat source,
such as a tealight or gas range, begin melting the edges. I like to hold it
above and let it melt. I do not hold it
too close to the flame. Do not put the
edge too close to the fire or it will burn (blacken) and melt too much. Always use safety measures when working with
fire. Keep a cup of cold water
nearby.

Step 3: It should look something like this. Continue with all remaining circles excluding
the tulle.

Step 4: Begin layering the petals in order by
size. Place the tulle in as well.

Step 5: Using a needle and thread. Tack the center of the flower by making an
“X” stitch. This stitch will hold the flower
together. It will also be hidden and not
seen when embellishment is placed on to the flower.
Step 6: Put a dab of glue on the embellishment.

Step 7: Place embellishment in
center of the flower covering the stitches.
Flower Headbands
Supplies:
Flowers
Felt
Headband
Needle
Thread
Scissors
Step 1: Determine the amount of flowers you want to
use and cut a piece of felt smaller than that.

Step 2: Stitch the flowers to
the felt. You may have to do it in more
than one place depending on how your flower lays.

Step 3: After sewing all
flowers onto felt, trim excess felt.

Step 4: Cut a felt strip that is no wider than 1 inch
and about the same length as your felt on the flowers.

Step 5: Place felt on top of headband and felted
flowers.

Step 6: Stitch felt to felt.

Step 7: This is how it should look when stitching is
complete.

Step 8: Final product.

Flower Clips

Supplies:
Flower
Clip
Felt
Needle
Thread
Scissors
Glue Gun
Step 1: Fold a small piece of felt in half (Hot Dog Style) and put two small
slits about 1/3 and 2/3’s of the way down.
The slits should be large enough for the clip to slide in when you have
unfolded it.

Step 2: Slide the clip onto the
felt. This is a view from the top.

Step 3: Using glue gun, glue the top part of the clip
that is showing to the felt.

Step 4: Using about 18 inches of thread, thread your
needle and knot it at the end.

Step 5: With your needle and
thread, sew the felt to the flower making sure that you do not go through all
layers of the flower because you do not want your thread to show.

Step 6: This is how the back of the flower will look
when it is complete.

Final Product:

Duck Tape Ring

Supplies:
Duck Tape
Scissors
Step 1: Cut the band.
It needs to be long enough to wrap around your finger and have some
excess. About 4 inches should be plenty.

Step 2: Trim off
about 1/3 of the duct tape (hot dog style)

Step 3: Fold in half (hot dog style). It maybe a little tricky because the tape
does not want to fold in half.

Step 4: Make sure that when you wrap it around your
finger you have about 3/4 inch excess on both sides of duck tape.

Step 5: Using a small
scrap of duck tape, tape the edges together.
Make sure that the ring band is not too tight. It needs to be comfortable.


Step 6: Fold the top in half. This is the base of the flower where the
petals will attach. Double check that it
is not going to be too tight on your finger.
Using the leftover tape, wrap it around the folded portion.


Step 7: Cut out 20-30
squares the same size. They can be small
or large, but they must all be roughly the same size.
Step 8: Fold the bottom corner of the square up
almost the entire way.

Step 9: Take the top
right corner and fold it down leaving the sticky tape showing on the left side.

Step 10: Begin by
wrapping the first petal on to stem.

Step 11: Continue
adding the petals to the flower. Be cautious
that you are not making the ring size too small.

Step 12: Once you
feel you have enough petals, determine if you would like one color or multiple
colors to wrap around the bottom outside to help hold the petals together.


Finished Product

Note: If your
scissors get sticky, use rubbing alcohol and cotton ball to clean.

Subscribe to:
Posts (Atom)