Cut 2 ¼” strips for binding on quilts with thin batting.
Cut 2 ½” strips for binding on quilts with thicker batting.
Cut enough strips to go around the perimeter of the quilt plus an additional 12-18”.
Cut bias binding if your quilt edge is curved or if you want a special effect from your fabric being cut on the diagonal.
Forming Binding Strip
Place two strips right sides together and sew diagonally.
Cut off additional fabric.
Press seams open.
Fold the strip in half lengthwise, wrong sides together, and press.
Attaching the Binding
You can begin binding anywhere along the edge of the quilt except in a corner.
Helpful hint: After you have selected a starting point, run the binding strip around the edge of the quilt to make certain that a seam does not fall into a corner. If it does, readjust the starting point.
Line up the raw edge of the strip with the raw edge of the quilt top.
Leaving a 6-8” tail, stitch the binding to the quilt with a ¼” seam allowance.
Stitch up to the seam line in the corner stopping ¼” before the end of the corner.
Take a few backstitches.
Remove from sewing machine.
Diagonally fold the binding strip away from the quilt.

Fold the binding straight down, even with the edge of the quilt.
Continue stitching and finish all sides and corners in the same matter.
When you are within 10-12” of your starting point, back stitch and remove the quilt from your machine.
Pin the binding to the remaining edge of the quilt, making sure to center the beginning, ending spot.
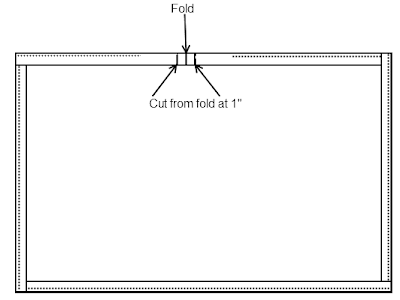
Fold the tails back and mark 1” on each beginning and ending tail.


Cut excess fabric off and unpin the unstitched binding.
The tails are placed at right angles with right sides together and stitched diagonally.

Leave a ¼” seam allowance by cutting any additional fabric off.
Press the seam open.
You are now ready to attach the remaining 10-12” of binding.
Stitching to the back
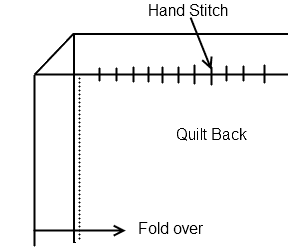
Fold the binding to the back, over the raw edges of the quilt.
The folded edge of the binding should just cover the machine-stitching line.
Blind-stitch the binding in place, making sure your stitches do not go through to the front of the quilt.
At the corners, fold the binding to form miters on the front and back of the quilt
Stitch down the folds in the miters.


