
Supplies:
*Fabric: Satin, Tulle, etc.
*Embellishments for center
*Felt
*Headband or Clips
*Circle Template or Rotary Circle Cutter
*Scissors
*Needle
*Thread
*Pencil
*Glue Gun
Step 1: Cut circles out in
varying sizes. The more layers you have
the puffier your flower will look. Have
a minimum of 8 layers. Here is a circle template.

Step 2: Using a heat source,
such as a tealight or gas range, begin melting the edges. I like to hold it
above and let it melt. I do not hold it
too close to the flame. Do not put the
edge too close to the fire or it will burn (blacken) and melt too much. Always use safety measures when working with
fire. Keep a cup of cold water
nearby.

Step 3: It should look something like this. Continue with all remaining circles excluding
the tulle.

Step 4: Begin layering the petals in order by
size. Place the tulle in as well.

Step 5: Using a needle and thread. Tack the center of the flower by making an
“X” stitch. This stitch will hold the flower
together. It will also be hidden and not
seen when embellishment is placed on to the flower.
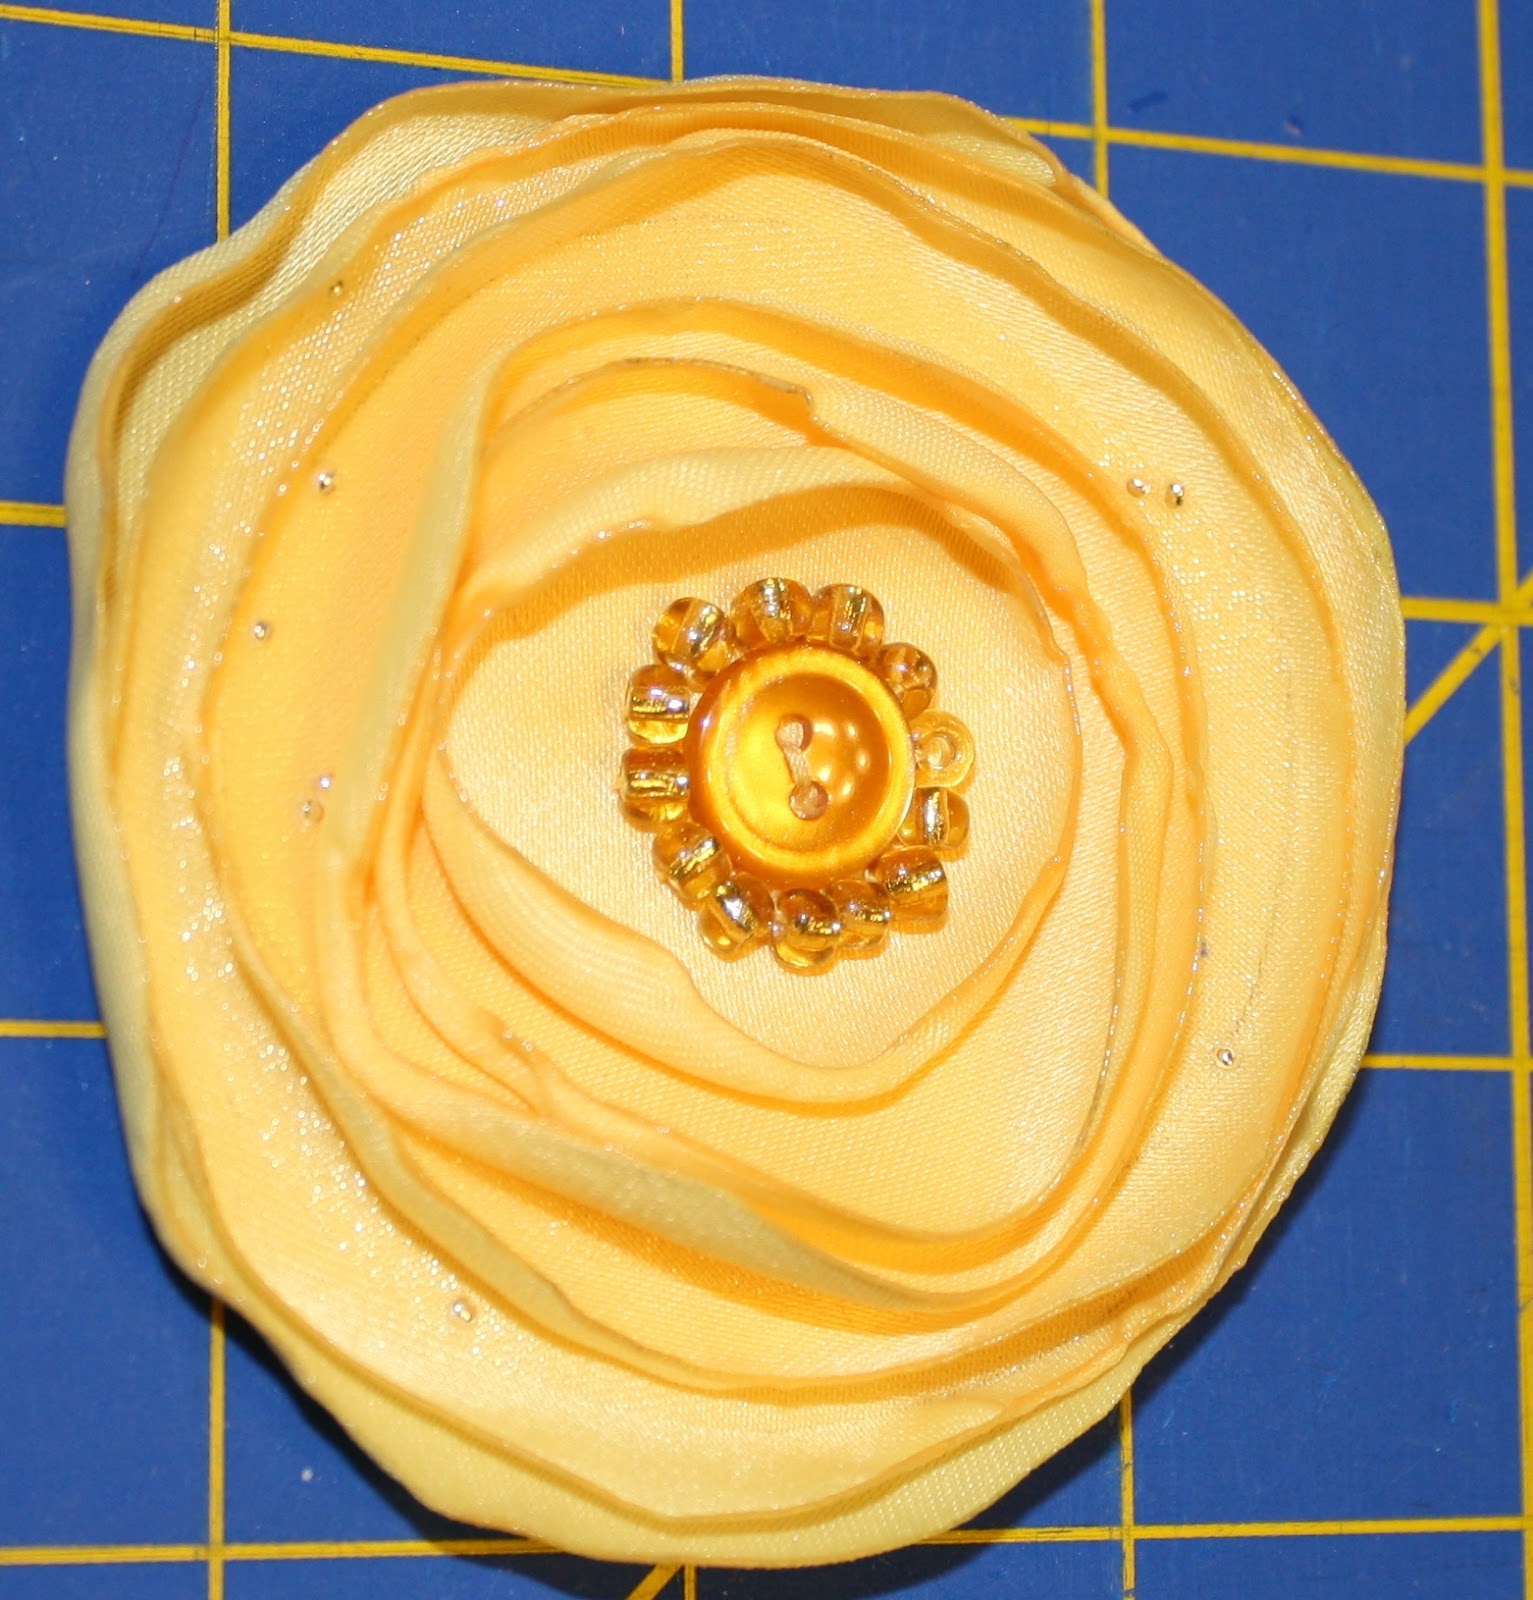
Step 6: Put a dab of glue on the embellishment.

Step 7: Place embellishment in
center of the flower covering the stitches.
No comments:
Post a Comment